21 Best Hikes in Yosemite National Park
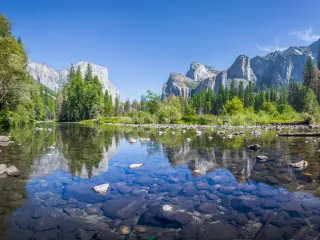
Yosemite National Park is deservingly one of the most visited national parks in the nation, with more than 3 million visitors each year. The best way to admire the strikingly breathtaking views that bring so many travelers here is to set off on a hike on one of its beautiful trails.
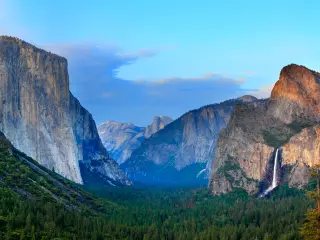
Our list of 21 best hikes in Yosemite National Park features trails of all levels, perfect for beginners looking for beautiful scenery and tranquil spots to have a picnic with a view, or seasoned experts looking to challenge themselves to a majestic summit.
Read on to find more about these amazing hikes in Yosemite, as well as the beautiful views you can admire on them, how to reach the trailheads, where to park, and our other helpful travel tips that will allow you to prepare for your unforgettable Yosemite adventure in the best way.
For an overview and short descriptions of each of these scenic hikes in Yosemite National Park, please click here to jump to the bottom of this article.
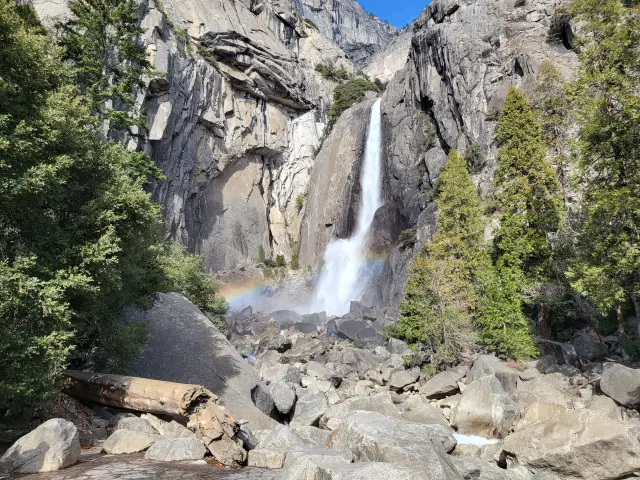
1. Lower Yosemite Falls Trail
1-mile loop (30 minutes)
Difficulty: Easy
What makes Lower Yosemite Falls a great hiking trail? This scenic trail allows you to get an up-close view of Lower Yosemite Falls, part of one of the tallest waterfalls in North America. The trail is short and paved, making it accessible. This is a great trail for hikers of all ages and abilities.
Highlights you can see while hiking Lower Yosemite Falls:
- Lower Yosemite Falls
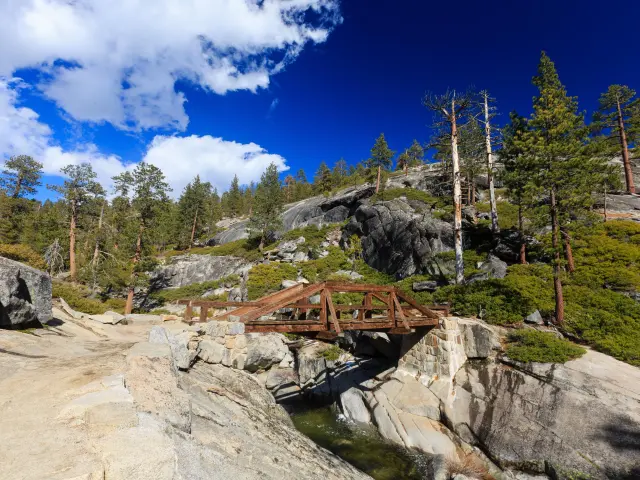
- Lower Yosemite Falls Bridge
How to get there: From Arch Rock Entrance, drive on El Portal Road and merge onto Southside Drive. Cross the Sentinel Bridge, then join Northside Drive, and the trailhead is near Yosemite Creek Bridge.
Where to park: There is no parking near the trailhead, nut you can use the Yosemite Village and Yosemite Falls parking lots. Ride the free Valleywide Visitor Shuttle to Stop #6 to access the trail.
Foodie stops near Lower Yosemite Falls Trail: Yosemite Valley, further along from the trailhead on Northside Drive, has eateries and coffee shops for a well-deserved treat after your hike.
Best time to visit: Lower Yosemite Falls Trail is open year-round.
In spring and early summer, the fall is at its most powerful.
From late July to August, it's often dry, so it's best to avoid the summer months if you want the full rip-roaring experience.
Camping on Lower Yosemite Falls Trail: You cannot camp on this trail. This is a short paved trail, so you'll have to use the nearby Camp 4 Yosemite Valley or Upper Pines Campground for camping.
Did you know? Yosemite Falls comprises three separate falls. The Upper Falls, the Middle Cascades, and the Lower Falls. The Lower Falls is the smallest at 320 feet.
When the waterfall is in full flow during spring, its estimated flow is 2,400 gallons per second.
Our travel tips: Use the Yosemite Village Parking Lot and make use of the free shuttle to access the trailhead.
Arrive early in the morning, or late afternoon to avoid the crowds.
Stay on the trail, while standing on the rocks near the base of the fall might seem like a great photo opportunity, the rocks are slippery and dangerous.
READ MORE - Our Guide to Lower Yosemite Falls Trail
2. Upper Yosemite Falls Trail
7 miles (6 hours)
Difficulty: Advanced
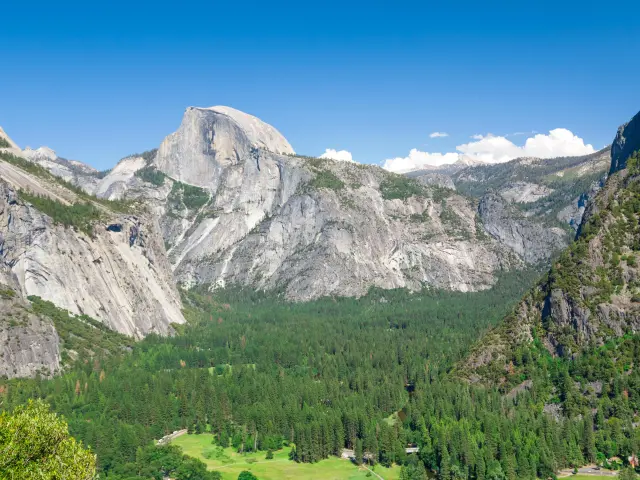
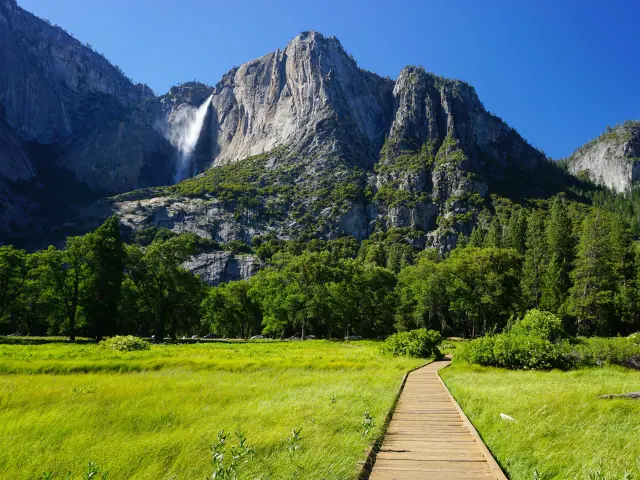
What makes Upper Yosemite Falls a great hiking trail? The Upper Yosemite Falls Trail leads you to the top of one of the tallest and most majestic waterfalls in North America. As you climb in elevation, you'll have gorgeous views of Yosemite Valley that you might recognize from travel magazines and postcards!
You'll also be able to see Half Dome, Sentinel Rock and, of course, the Yosemite Falls itself.
Highlights you can see while hiking Upper Yosemite Falls:
- Columbia Rock
- Half Dome
- Sentinel Rock
- Yosemite Valley
- Yosemite Falls
How to get there: It's accessible from both the South Entrance and Arch Rock Entrance. That said, the Arch Rock Entrance is arguably the most popular entrance for the Upper Yosemite Falls Trail.
After entering the park here, you'll drive on El Portal Road, Southside Drive, and then Northside Drive in a journey covering just 12 miles.
Where to park: Yosemite Falls Parking. The Falls have a designated parking lot on Northside Drive.
Foodie stops near Upper Yosemite Falls Trail: Yosemite Valley along Northside Drive has a coffee shop, The Mountain Room restaurant and Base Camp Eatery, so you won't be short of options.
Best time to visit: Upper Yosemite Falls Trail is open year-round. However, in winter, the trail can be icy and more dangerous.
In summer, because of the dry conditions causing low water levels, there may only be a trickle, so you might want to opt for another season if you want to see the waterfalls in their full glory.
Spring is considered the best time to visit because the Falls is in full flow after snowmelt.
Camping on Upper Yosemite Falls Trail: You can camp nearby, but if you plan to camp overnight, a wilderness permit is mandatory. You can get this permit from the Yosemite Valley Wilderness Center. Alternatively, Camp 4 Yosemite Valley is next to the Yosemite Falls Parking, close to the trailhead.
Did you know? As one of the tallest waterfalls in North America, it stands at 2,425 feet high.
Yosemite Falls comprises three falls, the Upper Falls, the Middle Cascades and the Lower Falls. The Upper Falls alone is 1430 feet tall.
Our travel tips: It is a good idea to start early. This will help avoid crowds, and the lack of shade makes it very hot during summer at midday.
Make sure to bring plenty of water. This is a demanding trail, especially in warmer months. There's a drinking fountain near the trailhead at Camp 4 to fill bottles.
Be prepared for steep switchbacks, as you'll have to climb 2,700 feet in elevation.
It is good to note that the terrain is rocky with loose gravel. You'll need to wear appropriate footwear to avoid injury.
Stay on the trail. There are steep and dangerous drops off the beaten track.
READ MORE - Our Guide to Upper Yosemite Falls Trail
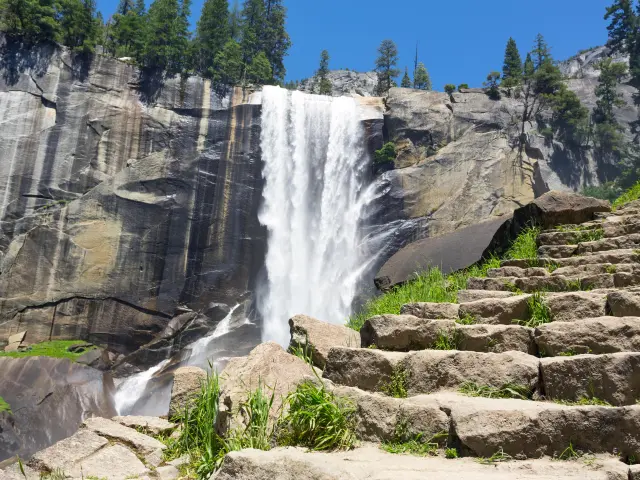
3. Mist Trail
6.4 miles (4 hours 10 minutes)
Difficulty: Moderate/Advanced
What makes Mist Trail a great place to hike? Mist Trail is often dubbed "park's landmark hike" because it is one of the most popular trails, if not the most popular!
Featuring two of the most beloved waterfalls in Yosemite National Park, Vernal and Nevada Falls, this hike has it all - from dramatic views of the Merced River to one side to the rugged views of Liberty Cap and Mt Broderick in the distance.
Highlights you can see while hiking Mist Trail:
- Vernal Falls
- Nevada Falls
- Liberty Cap
- Merced River
How to get there: This trail is easily reachable from Arch Rock Entrance, Big Oak Flat Entrance and South Entrance, which are about equal distances away.
Following Southside Drive and the brown signs for “Curry Village” in Eastern Yosemite Valley will get you to the parking lot and the trailhead.
Where to park: The nearest parking lot is on the eastern side of Curry Village.
Foodie stops near Mist Trail: Curry Village is the closest place with several eatery options.
Best time to visit: The lower portion of the Mist Trail along Vernal Fall usually closes in winter due to the risk of falling ice and rock.
The upper portion of the John Muir Trail between Clark Point and the top of Nevada Fall is closed in winter due to challenging icy conditions.
Keep in mind that the sections of trail that remain open in the winter may be very icy and/or snowy.
The best times to visit this trail are May through October. However, keep in mind that early spring is when the waterfall's flow is at its highest, and you will get wet if you choose to visit during this period and get close to the waterfalls.
Camping on Mist Trail: You can camp near the Mist Trail; the popular Lower Pines Campground, Upper Pines Campground and North Pines Campground are all a short distance away from the trailhead. Backpacker's Campground is also a short distance away.
Did you know? With its dramatic waterfalls and scenic views, the Mist Trail is unsurprisingly a favorite subject for photographers and artists.
Ansel Adams, one of the most renowned photographers of the 20th century, captured many iconic images of Yosemite here, although he is best known for his images of Half Dome and other park features.
Our travel tips: Parts of the trail might be closed due to trail work, please check ahead of your visit to make sure you can access it and to avoid any disappointment.
Bring waterproof gear if you are hiking the trail during early spring because you will get a” jumped-into-the-sea” level of wet! Also, for this reason, the canyon wall near the Vernal Fall can be slippery, so be careful.
The river here might look calm at times, but it actually has very dangerous currents going through it. If you slip into the water, these might be too strong to overcome, so be extra careful and do not approach the river.
READ MORE - Our Guide to Mist Trail
4. John Muir Trail
211 miles (2-4 weeks)
Difficulty: Advanced
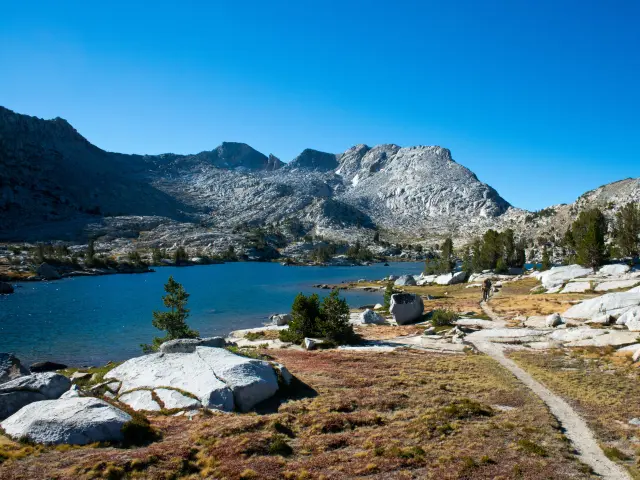
What makes John Muir Trail a great hiking trail? The perfect adventure for experienced hikers covering an impressive distance of 211 miles, the famous John Muir Trail is world-renowned for its stunning views.
Trekking through the Sierra Nevada Mountain range, you'll meet the wilderness with mountain peaks and alpine lakes.
Highlights you can see while hiking John Muir Trail:
- Yosemite Valley
- Kings Canyon National Park
- Sequoia National Park
- John Muir Wilderness
How to get there: The Arch Rock Entrance is the closest. Drive into the park on El Portal Road and join Southside Drive. This will turn into Happy Isles Loop Road and the trailhead is on this road.
Where to park: Long-term parking is available at Yosemite Valley. However, remember this hike takes weeks so it's advisable to arrive by public transport.
Foodie stops near John Muir Trail: Yosemite Village has a grocery store to stock up on supplies.
Best time to visit: In winter, high-elevation areas will be difficult to pass because of snow.
In the Sierra Nevada mountains, you can even encounter snow in mid-September.
So summer is the least challenging and it'll afford you more daylight so you can hike more miles per day.
Camping on John Muir Trail: Due to its length, camping is necessary along this trail. You'll need backcountry camping skills and permits are required. However, there are restrictions during the initial 4-mile stretch of the trail in Yosemite.
Did you know? The trail is named after environmentalist John Muir. He's known as "The Father of Our National Park System" after his work helped preserve national parks like Yosemite.
Our travel tips: Plan and prepare! The John Muir Trail is long distance and demanding. It requires careful planning to factor in gear, food, and resupply points.
On this hike, you'll pass the High Sierra. So, it is a good idea to take it slow and acclimate to the high elevations to avoid altitude sickness.
Be beary aware and keep your bear wits about you; you'll hike through areas of wilderness with active wildlife and might encounter bears among other residents of the national park.
READ MORE - Our Guide to John Muir Trail
5. Four Mile Trail
9.6-mile round trip (8 hours)
Difficulty: Moderate/Advanced
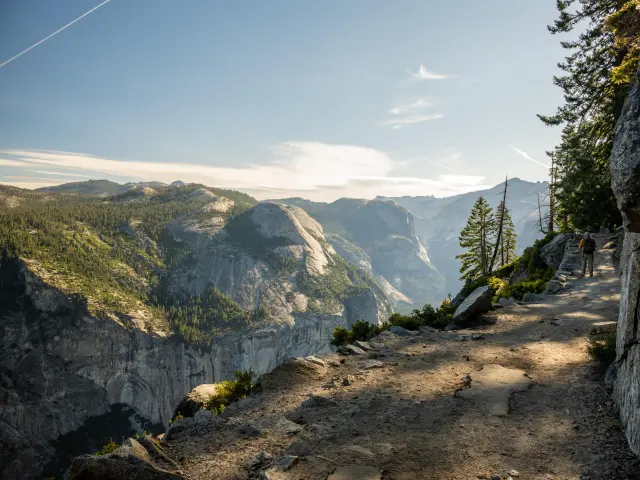
What makes Four Mile Trail a great hike? Get your camera ready for that award-winning shot! On this scenic hike, there are excellent photo opportunities.
The trail climbs 3,200 feet in elevation, offering panoramic valley views. You can spot the famous Yosemite landmarks such as El Capitan, Sentinel Rock, and Yosemite Falls.
Highlights you can see while hiking Four Mile Trail:
- El Capitan
- Sentinel Rock
- Yosemite Falls
- Yosemite Valley views
- Glacier Point
How to get there: In Yosemite Valley, the trailhead is accessible from all entrances. The most common are the South Entrance and Arch Rock Entrance. From the South Entrance, you can use Wawona Road to join Southside Drive.
Or far from the Arch Rock Entrance, use El Portal Road to join Southside Drive.
Where to park: You can find limited roadside parking near the trailhead. But if you struggle to find a space, use the Valleywide Shuttle and get off at Stop #11.
Foodie stops near Four Mile Trail: Yosemite Village is nearby. Here you can find eateries and a general store for provisions. It's worth noting that both the Swinging Bridge Picnic Area and Sentinel Beach Picnic Area are close to the trailhead.
Best time to visit: Due to the sharp switchbacks on this trail, it tends to close in winter. Generally speaking, it's open from spring to early fall. However, always check online for up-to-date news and closure information.
It's best to start the hike at 6am to 7am to avoid the crowds.
Camping on Four Mile Trail: You cannot camp along this trail. However, North and Upper Pines Campgrounds are around 2.5 miles from the trailhead.
Did you know? You might be surprised that Four Mile Trail isn't 4-miles long! It got its name from the original 1872 trail, which was, in fact, four miles long, not the 4.8 miles we know today. The original trail was designed to provide access to Glacier Point and remains a popular route today.
Our travel tips: Make sure to bring plenty of water, as the trail can be strenuous, especially on a warm day.
Before you set off, check trail conditions, especially if you plan to make the hike in shoulder seasons.
Prepare yourself for elevation gain and steep sections. Use proper footwear, this trail is known as a hotspot for sprained ankles.
Don't skip the switchbacks, there are dangerous hidden ledges!
READ MORE - Our Guide to Four Mile Trail
6. Mirror Lake Loop
5 miles (3 hours)
Difficulty: Moderate
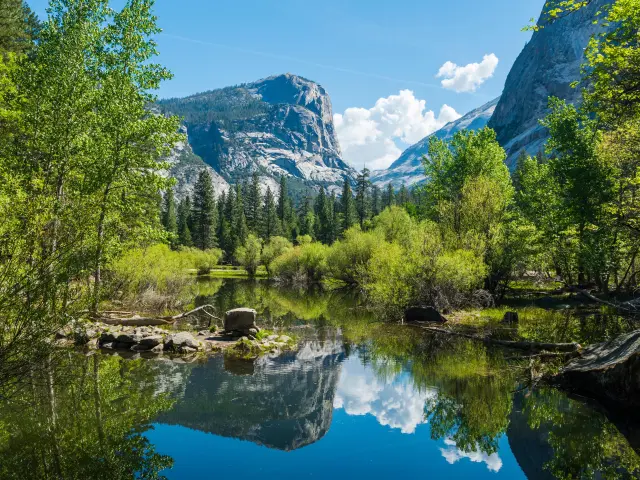
What makes Mirror Lake Loop a great hike? This hike takes you to one of Yosemite's iconic views, looking across Mirror Lake with the famous Half Dome in the background. The first part of the hike (Mirror Lake Trail) follows a paved road through the forest up to Mirror Lake.
This part of the hike is pretty straightforward, so you might prefer to turn back at this point, making a 2-mile round trip. For the full Mirror Lake Loop, you'll continue on around Mirror Lake, returning back towards the trailhead via Tenaya Canyon.
Highlights you can see while hiking Mirror Lake Loop:
- Mirror Lake
- Views of Half Dome, North Dome and Mt Watkins
- Tenaya Canyon
How to get there: Use Arch Rock Entrance and follow El Portal Road which runs alongside the Merced River until it merges onto Southside Drive.
Continue through Yosemite Valley on Southside Drive, keeping straight ahead instead of turning left to Yosemite Village. Park in Curry Village, just by the junction with Northside Drive and Happy Isles Loop Road.
Where to park: You can park at Curry Village, about a 5-minute walk from the trailhead.
Foodie stops near Mirror Lake Loop: You can pick up groceries for a picnic, snacks or treat yourself to ice cream in Curry Village, or continue on to Yosemite Village for a wider choice of refreshments.
Best time to visit: Mirror Lake dries up in the summer, so if you want to see the iconic view of the lake with reflections of the trees and granite cliffs, it's best to visit in spring when the lake is at its fullest.
The trail is accessible all year round but please note that can be icy or snowy in the winter.
The south side of the Mirror Lake Loop can be a challenging walk in winter. An alternative is to walk as far as you're comfortable on the north side of the lake and then return along the same path.
You can visit mid-week if you'd like to avoid the crowds.
Camping on Mirror Lake Loop: North Pines Camp Ground sits next to the Merced River, just a short walk from the trailhead.
Our travel tips: There's no fresh water on this trail, so make sure your water bottles are full before you set out.
Don't hike solo on this trail since Mountain Lions live in this part of Yosemite. Even though they are very photogenic from a long, long distance, it is best to admire one in the safety of a group from a sensible distance.
READ MORE - Our Guide to Mirror Lake Loop
7. Valley Loop Trail
11.5 miles (6 to 7 hours)
Difficulty: Easy/Moderate
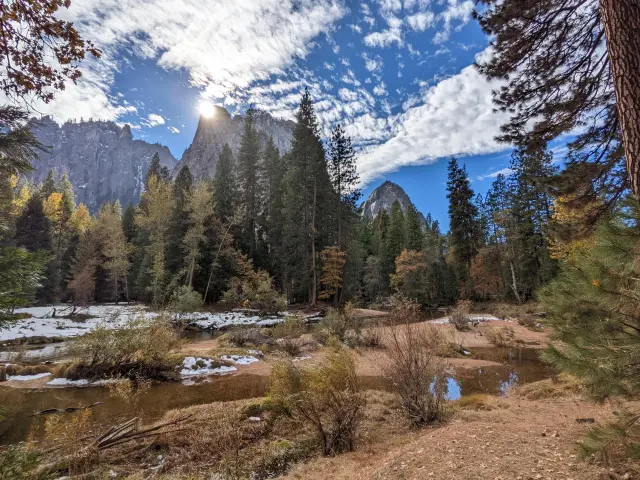
What makes Valley Loop Trail a great hike? Looking for the breathtaking views of Yosemite that you have seen on postcards? This beautiful hike gives you a snapshot of many of the highlights of Yosemite Valley, avoiding the road for most of the 11.5-mile loop and even picking up old wagon trails on some parts of the route.
It sticks close to the valley floor, so the route is relatively flat compared to many others in Yosemite. This makes walking fairly easy, but the length of the full loop might feel challenging if you're not a regular hiker.
Highlights you can see while hiking Valley Loop Trail:
- Merced River
- El Capitan
- Sentinel Bridge
- Yosemite Falls
- Swinging Bridge
- Yosemite Chapel
- Pohono Bridge
- Bridalveil Falls
How to get there: Arch Rock Entrance is the closest entry to the national park if you'd like to reach Valley Loop Trail - just follow El Portal Road then join Southside Drive, turning across Sentinel Bridge to reach Yosemite Village.
Where to park: Park at Yosemite Falls Trailhead or Yosemite Village then walk along the road to the start of the trail.
Foodie stops near Valley Loop Trail: If you have worked an appetite during your hike, you are in luck! There are several choices for refreshments in Yosemite Village itself. Or pack a picnic to enjoy at one of the many scenic picnic areas beside the Merced River.
Best time to visit: The Valley Loop Trail is accessible all year round, but expect to encounter some snow and ice on parts of the route in winter.
In summer, the route is surprisingly quiet, so it can be a great way to escape the crowds.
The fall colors are spectacular and offer a stunning backdrop to some of the landscapes you'll hike through.
Camping on Valley Loop Trail: You can camp near this popular trail at Camp 4 near Yosemite Village if you'd like to spend extra time admiring the scenery over a few days.
Did you know? Watch out for the view towards El Capitan that Albert Bierstadt captured in his famous painting Looking Down Yosemite Valley back in 1865 - the landscape is still instantly recognizable, even after a century and a half.
Our travel tips: Occasionally, you'll have to divert around some sections of the trail if maintenance work is being carried out, including controlled fires. Check at the visitor center before heading out, and always follow directions if you encounter a closure en route.
Hike with care in spring, when fast-flowing creeks can flood the trail.
READ MORE - Our Guide to Valley Loop Trail
8. Columbia Rock Trail
2 miles (3 hours)
Difficulty: Moderate
What makes Columbia Rock Trail a great hike? If you are a confident hiker who is looking for a relatively short adventure, this trail is the one for you! Columbia Rock is one of the main waypoints on the trail up to Yosemite Falls, and once you reach the rock, you'll be able to enjoy spectacular views across Yosemite Valley.
It's a fairly relentless uphill hike to get there, with switchbacks and steps taking you through around a mile of woodland. Keep going though - the view is worth it!
Highlights you can see while hiking Columbia Rock Trail:
- Yosemite Valley
- Half Dome
- Sentinel Rock
- Cathedral Spires
How to get there: From Arch Rock Entrance, take El Portal Road past Bridalveil Falls then continue along Southside Drive. Turn left across Sentinel Bridge then follow the road through Yosemite Village onto Northside Drive.
The Upper Yosemite Falls Trailhead starts just opposite Camp 4.
Where to park: The main parking area in Yosemite Village is around a mile away from the trailhead but carry on past Camp 4 and you'll find the Yosemite Falls parking area, which is smaller but closer to the trail.
Alternatively, if you're staying overnight at Camp 4 you'll be able to park at the campsite.
Foodie stops near Columbia Rock Trail: Yosemite Village has a range of food and drink options and is around a half-mile walk from the trailhead.
Best time to visit: The trail is open all year round, but Yosemite's usual seasonal variations apply: snow is possible in winter, and summer afternoons can feel extremely warm.
This is a popular hike so it's often crowded at weekends and during vacation periods.
Camping on Columbia Rock Trail: If you are looking to spend an evening in Yosemite, then you are in luck - Camp 4 is right by the Yosemite Falls Trailhead, where the Columbia Rock Trail begins.
Our travel tips: Note that, although Columbia Rock is on the Yosemite Falls Trail, you won't be able to see Yosemite Falls from here. If you want to see the falls themselves, continue another half mile up the trail.
READ MORE - Our Guide to Columbia Rock Trail
9. Clouds Rest Trail
12.5 miles (11 hours)
Difficulty: Advanced
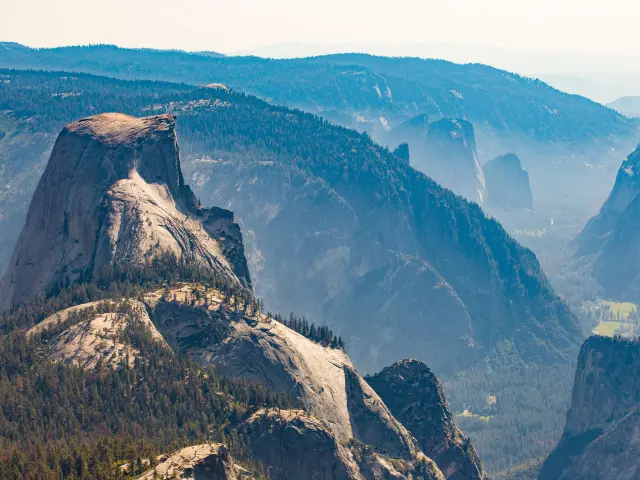
What makes Clouds Rest Trail a great hike? This is an amazing trail for experienced hikers, reaching an impressive elevation of almost 10,000 feet! The Clouds Rest summit looks out over one of Yosemite's most spectacular views.
On a clear day, you can see for miles, with a 360-degree view that includes the iconic Half Dome.
Highlights you can see while hiking Clouds Rest Trail:
- Tenaya Lake
- Tenaya Canyon
- Sunrise Peak
- Half Dome
- Yosemite Valley
How to get there: The trailhead is in the heart of Yosemite National Park, right on Tioga Road. If you're starting out to the east of the park, use the Tioga Pass Entrance and follow Tioga Road for around 25 miles.
For visitors beginning their journey further west in California, the Big Oak Flat Entrance is closer. Continue on Big Oak Flat Road as far as Crane Flat then turn left onto Tioga Road. You'll find the trailhead at the western end of Tenaya Lake.
Where to park: There's a small parking area at Sunrise Lakes Trailhead. As long as you follow signage and avoid the nearby no-parking area, there's also the possibility of roadside parking if the main lot is full.
Foodie stops near Clouds Rest Trail: Head to Tuolumne Meadows, where you'll find meal options at the Lodge and Grill. There are a few weeks at either end of the time that Tioga Road is open when the restaurants remain closed, so check ahead for details.
Otherwise, head to White Wolf, further west along Tioga Road.
Best time to visit: Tioga Road closes completely between November and May, so you won't be able to access the trailhead near Tenaya Lake at this time of year.
Given its high elevation, snow lingers on parts of Clouds Rest Trail through much of the summer. You'll need to be prepared for more technical hiking if there's snow on the ground.
Aim for September for the best chance of avoiding any snow on the trail.
Start early in the day so that you have time to return from the summit safely.
Camping on Clouds Rest Trail: You can't camp on the trail itself, but there are a couple of campsites within a short drive of the trailhead. Located 7 miles further west along Tioga Road, Porcupine Flat is the closest but it doesn't take reservations so factor this into your plans.
Closer to the Tioga Pass Entrance, Tuolumne Meadows Campground is a popular overnight stop, however it's expected to be closed for improvement work until 2025.
Our travel tips: This is a strenuous hike - not a walk with a view that's suitable for novices.
There are steep drop-offs at the summit, so this walk might not be first choice if you suffer from vertigo.
There are other routes up to Clouds Rest, so if you're triangulating with other information sources, make sure you're looking at the same trail.
Think carefully about leaving snacks in your car for the end of your hike - Yosemite's black bears will damage vehicles to get at any food they think is inside. Use the bear boxes in the parking lot instead.
READ MORE - Our Guide to Clouds Rest Trail
10. Cook's Meadow Loop Trail
1-mile loop (30 minutes)
Difficulty: Easy
What makes Cook's Meadow Loop Trail a great hike? Cook's Meadow Loop Trail has a vantage point for stunning views of the Yosemite Falls. You can also see iconic landmarks, including Half Dome, Glacier Point and Sentinel Rock.
What makes it extra special is the ability to see such iconic landmarks on a short trail. Not only short, it's also flat, making it suitable for all skill levels and ages.
Highlights you can see while hiking Cook's Meadow Loop:
- Yosemite Falls
- Half Dome
- Glacier Point
- Sentinel Rock
- Cook's Meadow
How to get there: Enter at either the Arch Rock Entrance or the South Entrance. Which entry depends on your departure point. For example, if driving east from San Francisco, then the Arch Rock Entrance is the most suitable.
From there, you can reach Yosemite Village on El Portal Road. Conversely, if you are coming from Los Angeles, the South Entrance is the preferred option. From this entrance, you'll drive on Wawona Road to reach Yosemite Village.
Where to park: Use either the Yosemite Village or Yosemite Falls parking areas. From the Yosemite Valley Visitor Center, you can catch the Valleywide Shuttle between 7am to 10pm to Stop #6 and the trailhead is over the road.
Foodie stops near Cook's Meadow Loop: Near the Yosemite Valley Visitor Center, you can find dining options and stores.
Best time to visit: Cook's Meadow Loop is open year-round.
The meadow is particularly pleasing to the eye in spring and early summer when wildflowers bloom.
But summer is also the busiest time, so arrive before 9 AM or late afternoon to avoid crowds.
Camping on Cook's Meadow Loop: Unfortunately, you cannot camp on this loop. But Yosemite Valley has campgrounds such as the Upper and North Pines.
Did you know? Cook's Meadow was named after the Cook family, who were important business owners in Yosemite and nearby areas in the late 1800s. J.J. Cook and his wife, Fannie Bruce Cook, came to Yosemite from New York during the Civil War.
Cook and his son, J.B., were involved in managing hotels such as the Wawona Hotel, Black's Hotel, and the Stoneman Lodge. Fannie Cook and her sister wrote and published poetry to promote Yosemite.
Our travel tips: It is important to stay on the marked trail. Staying on the designated paths helps to protect the fragile environment.
You can visit during the spring to see the blooming wildflowers.
Don't forget your camera! The trail offers some of the park's most iconic vistas.
READ MORE - Our Guide to Cook's Meadow Loop Trail
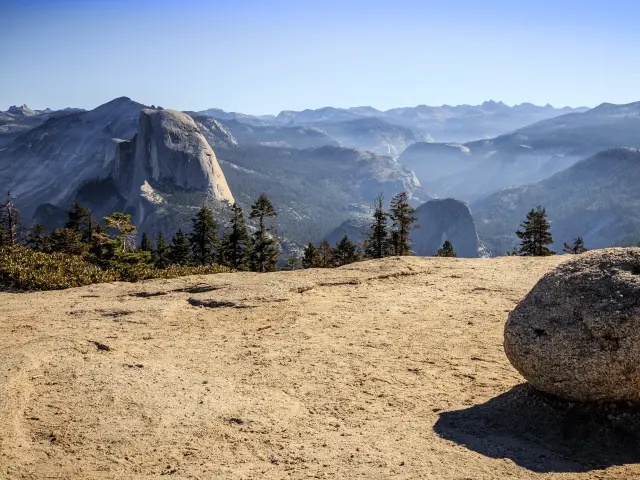
11. Glacier Point Trail
2-mile round-trip (40 minutes to 1 hour)
Difficulty: Easy/Moderate
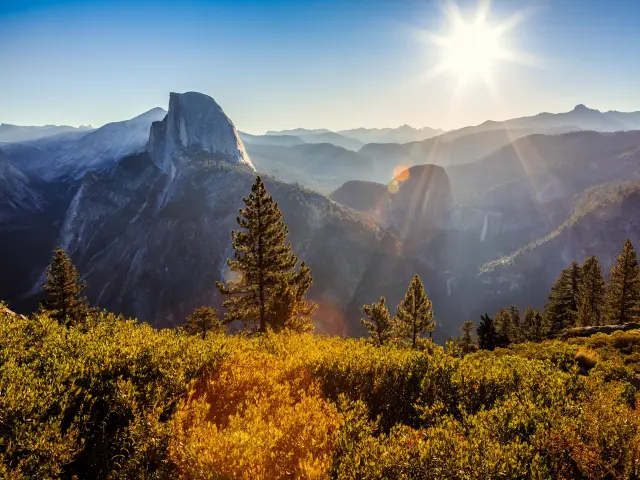
What makes Glacier Point Trail a great hike? This short but rewarding trail provides one of the most spectacular views in Yosemite. Once at Glacier Point, you'll have sweeping views of the valley with the Half Dome across the gorge.
Highlights you can while hiking Glacier Point Trail:
- Glacier Point Trailside Museum
- Glacier Point
- Half Dome
- Yosemite Valley
How to get there: The closest entrance to the Glacier Point Trail is the South Entrance near North Wawona. After entering Yosemite National Park, follow Wawona Road, then drive to the end of Glacier Point Road to reach the trailhead.
Where to park: Parking is available at the Glacier Point Trailhead at the end of Glacier Point Road.
Foodie stops near Glacier Point Trail: The Glacier Point Gift Shop and Snack Stand is near the overlook for a convenient bite. The shop is only open when Glacier Point Road is accessible.
Best time to visit: Glacier Point Road, which provides access to the trailhead, is closed during winter.
The road is typically open from spring to early fall, meaning the trail is inaccessible by car during these months.
Plan to arrive between 6am and 8am to avoid the crowds.
Camping on Glacier Point Trail: You cannot camp along the trail. Bridalveil Creek Campground is en route along Glacier Point Road.
Did you know? Glacier Point has been featured in the 2014 film 'Wild.' The film is based on the memoirs of Cheryl Strayed who is played by Reece Witherspoon.
Our travel tips: Bring layers. The weather can change at short notice and even during summer, it can be cool at the viewpoint.
Wear comfortable hiking shoes, although it's a short trail. There's uneven terrain.
Check road conditions before you visit. If Glacier Point Road is closed, then you won't be able to access the trailhead by car.
READ MORE - Our Guide to Glacier Point Trail
12. Taft Point Loop
2.2 miles round-trip (2 hours)
Difficulty: Moderate
What makes Taft Point Loop a great hike? The Taft Point Loop follows a section of Pohono Trail. This relatively short hike features stunning views, so it is a perfect option if you are short on time but want to admire the views.
Taft Point itself offers hikers the opportunity to get up close to the unique geology of fissures and see the deep cracks in the massive granite rock.
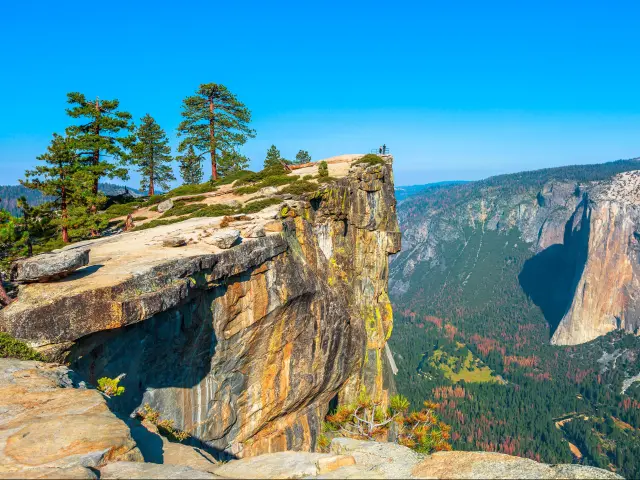
Highlights you can see while hiking Taft Point Loop:
- Taft Point
- The Fissures
- Views of Yosemite Valley and El Capitan
How to get there: Use the South Entrance to access the trailhead. From the entrance, you'll drive on Wawona Road for 17 miles before taking Glacier Point Road. Taft Point Trailhead is 13 miles along Glacier Point Road.
Where to park: There is parking available at the Taft Point Trailhead. Visitors also used the roadside parking here for the Sentinel Dome Trail.
Foodie stops near Taft Point Loop: While Yosemite Valley is just a few miles north, there are no roads and you'd go back on yourself. So, it's best to stop at North Wawona shortly after the South Entrance to get your supplies.
Best time to visit: Generally speaking, the trail is open from spring through to fall.
Glacier Point Road closes during the winter due to snow and ice. The exact closure dates vary, but after the first heavy snowfall, it'll shut until spring. This means there is no access to this hike during these months.
To avoid crowds, hike between 6am and 8am.
Camping on Taft Point Loop: There is no camping on the trail. However, Bridalveil Creek Campground is 6 miles away from the trailhead.
Did you know? The point is named in honor of William Howard Taft, the 27th President of the United States. As reported by newspapers, he reached the point when he was a guest of John Muir during his three-day trip to Yosemite in October 1909.
Our travel tips: Glacier Point Road is popular, so expect 30-minute delays.
You can combine the Taft Trail with the Sentinel Dome Trail for a longer hike.
The trail involves elevation changes. So wear comfortable hiking shoes and carry plenty of water. If you fear heights and cliff edges, it might be a good idea to avoid this hike.
Keep a safe distance from the edge of overlooks, not only high, but they also lack protective railings.
READ MORE - Our Guide to Taft Point Loop
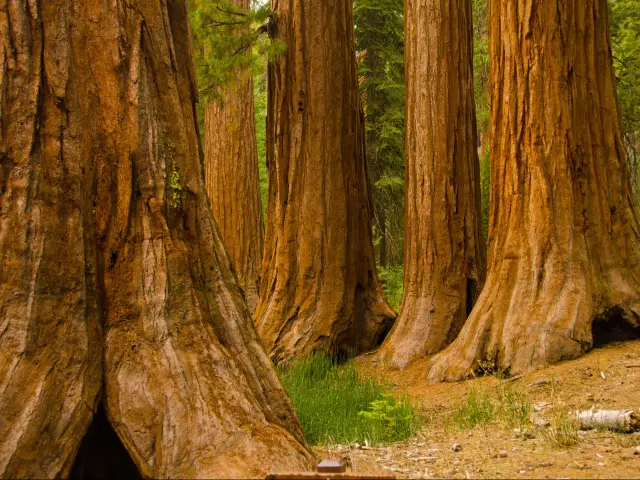
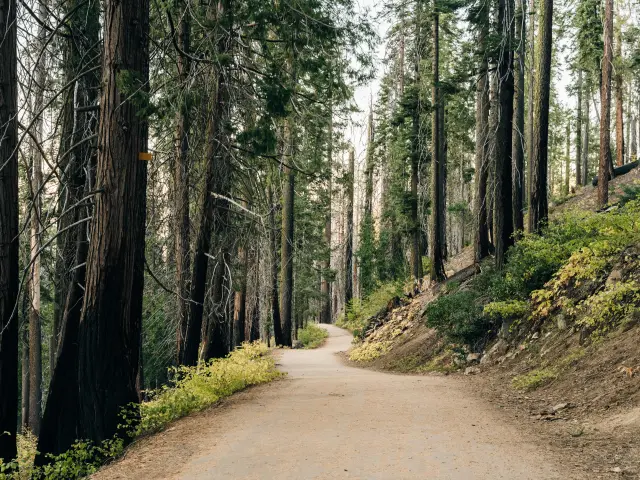
13. Mariposa Grove of Giant Sequoias Trail
7 miles (4 to 6 hours)
Difficulty: Advanced
What makes Mariposa Grove of Giant Sequoias Trail a great hike? The Mariposa Grove is famously home to over 500 mature giant sequoias, some of the largest trees on Earth. Standing 209 feet tall, the Grizzly Giant is a famous giant sequoia that you'll find here.
Walking among these towering giants is a unique and awe-inspiring experience. While the Mariposa Grove Trail is a 7-mile round trip, other hikes are available. Guardians Loop Trail is 6.5 miles, Grizzly Giant Loop is 2 miles, while the Big Trees Loop is 0.3 miles, so everyone can enjoy viewing the trees.
Highlights you can see while hiking Mariposa Grove of Giant Sequoias:
- Grizzly Giant
- California Tunnel Tree
- Faithful Couple
- Clothespin Tree
- Wawona Point
How to get there: The closest entrance to Mariposa Grove is the South Entrance. Turn onto Mariposa Grove Road under 400 feet after the South Entrance Station and drive to the trailhead.
Where to park: Parking is available at the end of Mariposa Grove Road. However, this is reserved for visitors with disability placards. In traffic relieving attempts from April to November, you'll have to park at the Mariposa Grove Welcome Plaza and use the free shuttle.
Foodie stops near Mariposa Grove of Giant Sequoias Trail: There's no dining within Mariposa Grove. You'll have to plan ahead and get supplies at Fish Camp before reaching the South Entrance.
Best time to visit: Mariposa Grove Road is open from mid-April to November. When it's open, you'll have to use the shuttle.
When the road is closed, you can still access the trail, but it'll most likely be dangerous with snow and ice. You'll have to hike, snowshoe or cross-country ski along Mariposa Grove Road to reach the trailhead.
When Mariposa Grove Road is open, we recommend arriving between 6 AM to 8 AM to avoid the crowds.
Camping on Mariposa Grove of Giant Sequoias Trail: You cannot camp in the groves. However, there are campgrounds in nearby Wawona, such as the Wawona Campground.
Did you know? The iconic California Tunnel Tree in the Mariposa Grove of Giant Sequoias was featured in the 1950 film "The Big Trees," starring Kirk Douglas and Eve Miller. This tree has a tunnel cut through it.
Our travel tips: Pets aren't allowed in Mariposa Grove or on the road leading to the trail, so please leave your furry friends at home while visiting this area.
Drinking water is only available at the Welcome Plaza, so make sure you stock up before jumping on the shuttle.
Pick a trail to suit you. If the full Mariposa Grove of Giant Sequoias Trail is too much, the Big Trees Loop Trail is the easiest, while the Grizzly Giant Loop Trail is more moderate.
READ MORE - Our Guide to Mariposa Grove of Giant Sequoias Trail
14. Sentinel Dome Trail
1.8-mile round-trip (2 hours)
Difficulty: Easy/Moderate
What makes Sentinel Dome Trail a great hike? Not scared of heights? On Sentinel Dome Trail, you will be able to reach the summit of Sentinel Dome, with breathtaking scenery surrounding it. At the top, you'll have 360-degree views of the Yosemite Valley.
Highlights you can see while hiking Sentinel Dome Trail:
- Sentinel Dome Summit
- Famous panoramic view to spot Yosemite Valley landmarks, including Yosemite Falls and El Capitan to the North.
How to get there: Enter at the South Entrance Point. After 17 miles on Wawona Road, turn right onto Glacier Point Road. The trailhead is around 14 miles along Glacier Point Road and is before Glacier Point, which is further along the road.
Where to park: There's roadside parking on Glacier Point Road near the trailhead. It is limited, so arrive early during peak seasons.
Foodie stops near Sentinel Dome Trail: Glacier Point Gift and Snack Stand is further along the road near Glacier Point. It's just 2 miles from the Sentinel Dome Trailhead.
Best time to visit: Glacier Point Road closes during winter because of snow. Usually, it's open from late May to October or November. However, it is always a good idea to check before traveling to make sure.
You can still access the trail in winter, but only on foot. From late December to March, Glacier Point Road is prepared for cross-country skiing.
When the trail is open, it gets busy, so it is a good idea to plan to arrive before 9am.
Camping on Sentinel Dome Trail: This is another trail that, unfortunately, doesn't have access to any campgrounds. Bridalveil Creek Campground is along Glacier Point Road, around 5 miles before the trailhead.
Did you know? Sentinel Dome features in Ansel Adams photograph "Monolith, The Face of Half Dome." The famous photo is one of the most celebrated landscape photographs ever.
Our travel tips: Bring water, because there's limited availability along the trail.
It's windy at the summit of the dome, so bring layers and prepare for changing conditions.
Take the short detour to Taft Point while on the trail, another famous Yosemite viewpoint.
READ MORE - Our Guide to Sentinel Dome Trail
15. Grizzly Giant Loop Trail
2-mile loop (2 hours)
Difficulty: Moderate
What makes Grizzly Giant Loop Trail a great hike? The Grizzly Giant Loop Trail takes you through the ancient Mariposa Grove of Giant Sequoias. The star attraction is the iconic Grizzly Giant tree. This giant sequoia is one of the largest trees in the world!
Not only will you stand in awe of its size, but it's an estimated 2,995 years old, so you'll be in the presence of a true natural wonder.

Highlights you can see while hiking Grizzly Giant Loop Trail:
- The Grizzly Giant Sequoia Tree
- More giant sequoias in Mariposa Grove
- The California Tunnel Tree
How to get there: Enter the park at the South Entrance. After a few hundred feet, take a right turn onto Mariposa Grove Road.
Where to park: Parking at the trailhead is only available to vehicles with a disability placard. From April to December, you'll have to park at the Welcome Plaza and take the free shuttle. There are 300 spaces, so arrive early in summer.
Double-check dates and last shuttle times as they vary depending on the month and each year.
Foodie stops on Grizzly Giant Loop Trail: Stop at Fish Camp to stock up on food and snacks before arriving at Mariposa Grove.
Best time to visit: Mariposa Grove Road closes in winter. Generally speaking, the closure is from November to April. Please check before traveling to avoid any disappointment.
The trails remain open, although because of snow, you'll have to access the trail using cross-country skis or snowshoes.
Summer is the peak season, so consider arriving early to get a parking space and avoid the crowds.
Camping on Grizzly Giant Loop Trail: You cannot camp on the trail except for winter. Overnight camping in the grove is available from December to April, provided there's enough snow. You'll need a wilderness permit and they restrict camping to certain areas.
Otherwise, there's a campsite at Fish Camp called Summerdale Campground.
Did you know? The Grizzly Giant stands 209 feet tall and has a 96-foot circumference at the base! The Grizzly Giant is a symbol of conservation and played a significant role in establishing the National Park system.
Our travel tips: Respect the trees and stay on the paths. Staying on designated paths protects the fragile roots of these ancient trees.
Pets aren't allowed in the Mariposa Grove area.
There's no drinking water along the trail, so fill up at the Mariposa Grove Welcome Plaza.
READ MORE - Our Guide to Grizzly Giant Loop Trail
16. Wapama Falls Trail
5 miles round-trip (2 hours)
Difficulty: Moderate
What makes Wapama Falls Trail a great hike? The Wapama Falls Trail leads you to the base of Wapama Falls, which plunges into the Hetch Hetchy Reservoir. The trail goes around the reservoir, offering beautiful water views and the iconic granite cliffs of Yosemite.

Highlights you can see while hiking Wapama Falls Trail:
- Hetch Hetchy Reservoir
- Wapama Falls
- Granite cliffs
How to get there: Enter at the Hetch Hetchy Entrance near Mather. Follow Hetch Hetchy Road and continue on Evergreen Road for just under 8 miles to reach the trailhead.
Where to park: Parking is available near the dam on Evergreen Road.
Foodie stops near Wapama Falls Trail: Stock up on supplies before reaching the trailhead. Use the Camp Mater General Store in Mather on Hetch Hetchy Road before the entrance.
Best time to visit: The trail is open year-round, and the low elevation makes it accessible for most of the year.
However, during winter, adverse weather can result in sudden closures. You can find up-to-date conditions by calling 209-372-0200.
Be aware the road leading to the trail is often only open from 8am to 5pm.
Camping on Wapama Falls Trail: You can go on an overnight backpacking trip here, but keep in mind that a wilderness permit is a must. You can get permits from the Hetch Hetchy Entrance at no extra cost.
Did you know? Wapama Falls descends around 1,100 feet.
Our travel tips: Take extra care when approaching the falls. Mist can cause slippery conditions.
It is a good idea to wear appropriate footwear to tackle rock terrain.
If you plan overnight hiking, bear canisters are mandatory and always keep a keen eye out for rattlesnakes.
You might be surprised to learn that one of the biggest causes of injury is the lack of hydration on the Wapama Falls Trail, so make sure to bring water with you.
READ MORE - Our Guide to Wapama Falls Trail
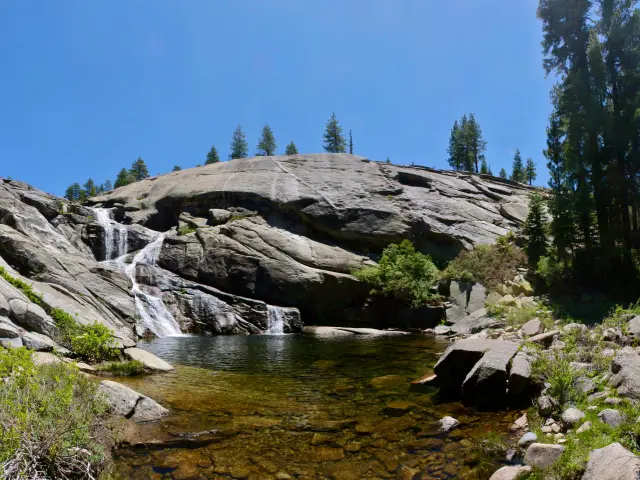
17. Chilnualna Falls Trail
8.2 miles round-trip (4 hours to 6 hours)
Difficulty: Advanced
What makes Chilnualna Falls Trail a great hike? The Chilnualna Falls Trail is a rewarding hike through a forested landscape. The highlight is the waterfall, with multiple cascades and pools set in the granite rocks. It's a less crowded alternative to some of the more famous waterfall trails in Yosemite.
Highlights you can see while hiking Chilnualna Falls Trail:
- Lush forest scenery
- Chilnualna Falls
- Peaceful surroundings
How to get there: Enter at the South Entrance, sometimes known as the Wawona Entrance. Follow Wawona Road for 5 miles and take the right turn onto Chilnuala Falls Road. Continue past North Wawona to reach the trailhead.
Where to park: There's parking designated for Chilnuala Falls before the trailhead. Follow the signposts onto the dirt road.
Foodie stops near Chilnualna Falls Trail: Pine Tree Market in North Wawona is along Chilnuala Falls Road 0.5 miles before the trailhead.
Best time to visit: Although open year-round, winter closures may occur due to snow.
Hike in spring or fall when it's less dangerous and slippery underfoot.
It's a quiet trail, so you're flexible with arrival time. That said, arriving early allows you to complete the hike in daylight.
Camping on Chilnualna Falls Trail: NPS doesn't permit camping on the trail. There's camping at Wawona such as the Wawona Campground but there are also cabin lodges further along Chilnuala Falls Road in North Wawona.
Did know? Chilnualna is a Native American word with some debate behind the meaning. Some claim the meaning as “leaping waters” while others dispute the meaning, claiming it as “many rocks".
Chilnualna Falls comprises three falls, a 50-foot fall, and a 100-foot cascade, followed by a 240-foot fall.
Our travel tips: Bring lots of water with you; Chilnualna Falls Trail a long hike and in summer you'll need to keep hydrated.
Be careful near water, the granite rocks become very slippery.
Similar to some of the other hikes mentioned above, you can encounter active wildlife, such as bears and rattlesnakes on the trail, so be careful underfoot and store your food safely. This is one of the rare situations when sharing isn't caring!
READ MORE - Our Guide to Chilnualna Falls Trail
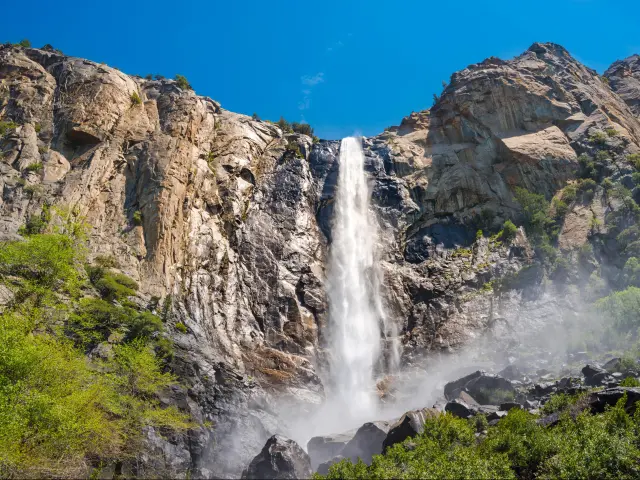
18. Bridalveil Falls Hike
0.5 miles (15 minutes)
Difficulty: Easy
What makes Bridalveil Falls Hike a great trail? This short round-trip walk takes you to stunning Bridalveil Falls, one of the highlights of Yosemite National Park.
For most visitors, it's the first chance to see one of Yosemite's many spectacular waterfalls, so it makes a great stop as you enter Yosemite Valley. For much of the year, the cascading water creates a delicate effect, similar to a bride's veil.
At the time of writing, Bridalveil Falls Trail has been closed for a some time due to a major repair project. This is due to be completed toward the end of 2023, but check ahead before traveling if a close-up view of Bridalveil Falls is an essential part of your Yosemite trip.
Highlights you can see while taking Bridalveil Falls Hike:
- Bridalveil Falls
How to get there: Arch Rock Entrance is the closest. From here, take El Portal Road until it joins Southside Drive. Turn right where Southside Drive joins up with Wawona Road and you'll see the well-signposted parking area almost immediately after this turning.
It's also easy to reach Bridalveil Falls Trail if you're coming from the south of Yosemite. Follow Wawona Road all the way and you'll find the trailhead a short distance after Tunnel View.
Where to park: There's a parking lot right by the trailhead, close to the point where Wawona Road meets Southside Drive.
Foodie stops near Bridalveil Falls Hike: There are no restaurants or stores directly beside Bridalveil Falls. If you're planning a picnic before you start this short hike, stock up at El Portal Market just before you enter the park.
Alternatively, continue further through the park to Yosemite Village or Curry Village where you can choose from a range of meal and snack options.
Best time to visit: Bridalveil Falls Trail is open all year round, and since the waterfall flows all year round too, this is a great short hike for times when other waterfalls in Yosemite run dry.
The waterfall is at its most intense in the spring - take care as there can be significant spray at the bottom which makes rocks and paths slippery over a wide distance.
As a popular and accessible waterfall, you'll often encounter crowds along the Bridalveil Falls Trail unless you come really early in the day.
Camping on Bridalveil Falls Hike: The nearest campgrounds are further along Yosemite Valley. Camp 4 is the closest but there are also a range of options closer to Curry Village.
Did you know? Photographer Ansel Adams captured Bridalveil Falls on camera back in 1927, and his image remains one of the iconic views of Yosemite.
Our travel tips: This is one of the few trails in Yosemite where dogs are allowed so it's a great chance to stretch your legs if you're traveling with your four-legged companion.
Unlike other popular views and trails, Bridalveil Falls isn't accessible via the free shuttle service. That means you'll have to drive or walk here to follow the trail up to the waterfall.
Even though the trail is paved all the way, it's steep in places so it isn't recommended for wheelchair users.
READ MORE - Our Guide to Bridalveil Falls Hike
19. Tuolumne Grove Loop Trail
2.5 miles (1 to 2 hours)
Difficulty: Moderate
What makes Tuolumne Grove Loop Trail a great hike? Tuolumne Grove is one of three places in Yosemite National Park where you can see Giant Sequoia Trees. You can't see the trees from the road, so you'll have to follow this wooded trail to reach them.
There are around two dozen trees to admire, including Big Red and the Tunnel Tree.
Highlights you can see while hiking Tuolumne Grove Loop Trail:
- Old Big Oak Flat Road
- Sugar pine and white fir forest
- Tuolumne Grove of Giant Sequoias
How to get there: From Big Oak Flat Entrance, follow the road south as far as Crane Flat Gas Station. Turn left here onto Tioga Road and you'll find the Tuolumne Grove parking lot and trailhead on the left after around a quarter of a mile.
Where to park: There's a small parking lot at the trailhead.
Foodie stops near Tuolumne Grove Trail: Pick up snacks at nearby Crane Flat Gas Station or wait until you're further along Tioga Road for a meal at White Wolf (summer only).
Best time to visit: Although Tioga Road is closed during the winter months, you'll still usually be able to drive as far as the Tuolumne Grove parking area if you're starting in Yosemite Valley or Big Oak Flat Road.
Come early in the day to avoid the crowds and for the best chance of a parking spot - the lot at Tuolumne Grove Trailhead fills up early.
Camping on Tuolumne Grove Trail: Crane Flat Campground is close to the trailhead but it's only open between July and October. Reservations are needed here, so plan ahead for a smooth trip.
Did you know? The original Big Oak Flat Road ran through Tuolumne Grove, right through the Tunnel Tree that you can still see today. It was designed as a novelty to attract visitors to Yosemite, but only pedestrian traffic passes underneath it these days.
Our travel tips: Although this is a relatively short hike that's suitable for most visitors in the summer months, be prepared for the steep, 500-meter uphill stretch on the walk back to the parking area.
Expect snow in the winter, which makes this a more challenging hike. Snowshoes are recommended, and it's also possible to cross-country ski to see the sequoias, although the steep uphill return journey can be hard work!
READ MORE - Our Guide to Toulumne Grove Trail
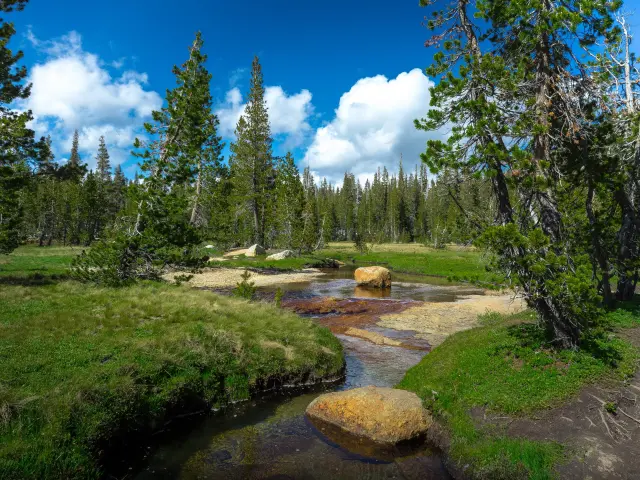
20. Cathedral Lakes Trail
7 miles (6 hours)
Difficulty: Moderate
What makes Cathedral Lakes Trail a great hike? This moderate out and back hike takes you to two spectacular mountain lakes, where you'll see reflections of the surrounding forests and mountains if conditions are right.
It's all uphill until you reach the lakes so you'll need a reasonable level of fitness - but on the plus side, that makes the route back down much easier.
The route follows part of Yosemite's John Muir Trail. Although offering spectacular views, Cathedral Lakes Trail is a little less crowded than many of the hikes from Yosemite Valley.
Highlights you can see while hiking Cathedral Lakes Trail:
- Upper Cathedral Lake
- Lower Cathedral Lake
- Cathedral Peak
How to get there: Tioga Pass Entrance is around a 15-minute drive from the Cathedral Lakes Trailhead. Simply enter Yosemite from the east then continue along Tioga Road, past Tuolumne Meadows, until you see the sign for Cathedral Lakes.
Where to park: There's a limited amount of parking at the trailhead itself, and also a parking area at the far end of Tuolumne Meadows which gives good access to Cathedral Lakes trailhead.
Foodie stops near Cathedral Lakes Trail: You can pick up a meal or snacks at Tuolumne Meadows Visitor Center, which is around half a mile away from the trailhead.
Best time to visit: The trailhead is located on Tioga Road, which closes to vehicles between November and May.
Make an early start to secure a parking space and to complete the harder uphill stretch before it gets too hot.
Tuolumne Meadows campground is only open from July to September.
Camping on Cathedral Lakes Trail: If you have a wilderness permit, there are several places where you can pitch your tent close to the Cathedral Lakes. If you're looking for more facilities, the nearest campground is at nearby Tuolumne Meadows.
Did you know? The 'n' in Tuolumne is silent.
Our travel tips: This part of Yosemite is famous for its mosquitoes, so be sure to bring bug spray in your pack.
Although it's a great one-day hike, Cathedral Lakes is also a popular place for overnight backpacking. You'll need to apply in advance for a wilderness permit.
READ MORE - Our Guide to Cathedral Lakes Trail
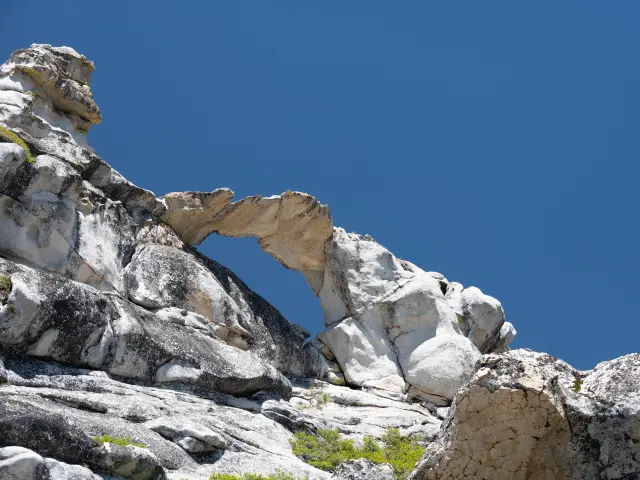
21. North Dome Trail
to Indian Rock
6.5 miles (4 to 5 hours)
Difficulty: Moderate
What makes North Dome Trail a great hike? This is a section of the Yosemite Falls and North Dome Trails that is moderately challenging and takes you to one of Yosemite's only natural arches.
You'll find Indian Rock part of the way along the trail to North Dome, so it's a good stopping point if you're continuing on a longer hike, or also a good way to enjoy the rugged landscape between Tioga Road and Yosemite Valley if you don't have time for the full North Dome Trail.
Compared to routes in Yosemite Valley, the trail to Indian Rock is likely to be less crowded while still offering amazing views.
Highlights you can see while hiking North Dome Trail:
- Half Dome
- Indian Rock
- North Dome
How to get there: Use the Tioga Pass Entrance and head west through Yosemite along Tioga Road. You'll pass Tuolumne Meadows and Tenaya Lake before you reach Porcupine Creek trailhead.
Where to park: There's a parking lot at Porcupine Creek Trailhead, and it's also possible to park on the roadside (as long as there are no signs to the contrary).
Foodie stops near Indian Rock Trail: Although there are some spectacular picnic areas in this part of Yosemite, you'll need to bring your own food or else face a further drive after your Indian Rock hike. Both White Rock Lodge and Tuolumne Meadows Visitor Center are around a 20-minute drive.
Best time to visit: Tioga Road is closed between November and May so you won't be able to access the trailhead at this time of year.
Camping on Indian Rock Trail: Backpacking is allowed if you have a wilderness permit. Back on the road, Porcupine Flat Campground is the nearest to the trailhead, but it's not recommended for visitors for RVs and only has limited facilities (you'll need to treat your own drinking water, for example).
Tuolumne Meadows Campground is closed until 2025 for repair work, but when it reopens, it's a good choice if you're looking for a campground closer to more facilities.
Did you know? Some sources claim that Indian Rock is Yosemite's only natural rock arch. This isn't entirely true - there are a few others dotted around - but they're definitely a rarity compared to other national parks you might have visited.
Our travel tips: The final stretch of the trail up to Indian Rock isn't always clearly marked so take your time to work out any junctions so that you don't miss out on this spectacular natural landmark.
READ MORE - Our Guide to North Dome Trail
| Trail Name | Description |
|---|---|
| 1. Lower Yosemite Falls Trail | An easy, paved loop that offers close-up views of the iconic Yosemite Falls' lower section |
| 2. Upper Yosemite Falls Trail | A strenuous ascent that rewards with stunning panoramas and a top-down view of the tallest waterfall in North America |
| 3. Mist Trail | Known for its drenching mist from Vernal and Nevada Falls, it's one of the most popular and scenic trails in Yosemite |
| 4. John Muir Trail | A long-distance trail running through the Sierra Nevada mountain range, showcasing a vast array of Yosemite's natural beauty |
| 5. Four Mile Trail | A steep trail connecting Yosemite Valley to Glacier Point, offering breathtaking views of the valley |
| 6. Mirror Lake Loop | A gentle trail leading to a seasonal lake that beautifully reflects the surrounding cliffs |
| 7. Valley Loop Trail | A long, flat loop encircling Yosemite Valley, showcasing diverse views of famous landmarks |
| 8. Columbia Rock Trail | A portion of the Upper Yosemite Falls Trail, this hike provides a panoramic view of Yosemite Valley from Columbia Rock |
| 9. Clouds Rest Trail | A challenging hike leading to a summit that offers one of the most comprehensive views of Yosemite National Park |
| 10. Cook's Meadow Loop Trail | An easy stroll through a serene meadow with iconic views of Yosemite's granite landmarks |
| 11. Glacier Point Trail | Leads to an incredible overlook offering panoramic views of Yosemite Valley, Half Dome, and the High Sierra |
| 12. Taft Point Loop | Takes hikers to a cliff edge, offering vertigo-inducing views of the valley below |
| 13. Mariposa Grove of Giant Sequoias Trail | A network of trails through a grove home to over 500 mature giant sequoias |
| 14. Sentinel Dome Trail | An ascent to a granite dome, offering 360-degree views of Yosemite |
| 15. Grizzly Giant Loop Trail | A loop through Mariposa Grove showcasing its iconic ancient sequoias, including the Grizzly Giant |
| 16. Wapama Falls Trail | Leads to a waterfall cascading over granite cliffs in the Hetch Hetchy area |
| 17. Chilnualna Falls Trail | A less-traveled path leading to a series of cascading waterfalls in Yosemite's southern region |
| 18. Bridalveil Falls Hike | A short trek leading to the base of one of Yosemite's most famous waterfalls |
| 19. Tuolumne Grove Trail | A downhill trail leading to a smaller grove of giant sequoias, highlighted by a tunnel cut through a fallen tree |
| 20. Cathedral Lakes Trail | Takes hikers through alpine meadows to picturesque high-elevation lakes surrounded by granite peaks |
| 21. North Dome Trail to Indian Rock | Leads to the only naturally occurring arch in Yosemite, offering unique rock formations and views |

Sasha Yanshin – Co-Founder & Lead Driver
Sasha Yanshin has spent the last 15+ years mapping and driving thousands of miles across Europe and the US. As the Co-Founder and Lead Driver of Lazytrips, he brings an analytical approach to road-tripping, sharing meticulously tested routes, realistic drive times, and the hard-earned logistical reality of the open road.
Read full bio